
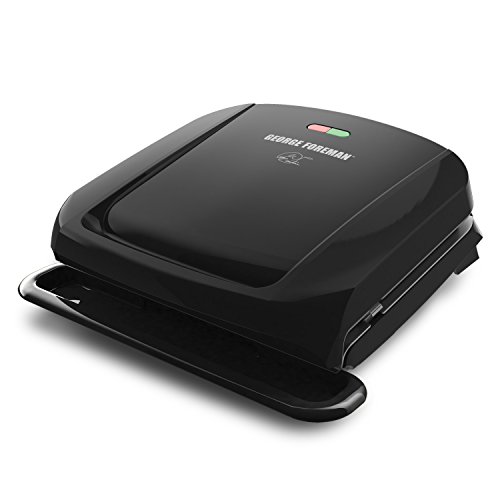
How to Cook Bacon on a George Foreman Grill Without Sticking or Flare-Ups
Cooking bacon on a George Foreman grill delivers crispy, evenly browned strips with far less grease than traditional stovetop frying. The grill’s sloped design drains excess fat into the drip tray as the bacon cooks, and the top plate presses down gently to ensure both sides cook at once.
Many home cooks wonder whether bacon will stick to the grill plates or create flare-ups, but with a few straightforward techniques—preheating, proper strip placement, and timed flips—you can turn out restaurant-quality bacon in under ten minutes. We’ve tested these methods across our entire lineup, from compact two-serving units to family-size models, and the results are consistently excellent.
Preparing Your Grill and Bacon Strips
Start by plugging in your grill and closing the lid to preheat for three to five minutes. A hot surface sears the bacon immediately, which reduces sticking and helps fat render more evenly.
While the grill heats, pat each strip dry with a paper towel to remove surface moisture—wet bacon steams rather than crisps, and any water droplets can cause splattering. Lay the strips in a single layer on a plate or cutting board, keeping them separated so they’re easy to transfer without tearing.
If you’re using thick-cut bacon, trim any overlapping fat caps with kitchen shears; uneven thickness leads to parts that cook too fast while others stay chewy. Standard-cut strips rarely need trimming, but a quick visual check saves frustration later.
Arranging Strips on the Grill Surface
Open the preheated grill and place bacon strips perpendicular to the ridges on the bottom plate. Leave a narrow gap—about a quarter inch—between each strip so rendered fat can flow freely into the channels and down to the drip tray.
Avoid overlapping or folding strips, even if you’re working with a smaller model; overlapped bacon cooks unevenly and the layers trap grease, which can smoke or spatter. The four-serving removable-plate grill fits up to six standard strips comfortably with proper spacing, while compact two-serving units handle three to four.
Close the lid gently—don’t press down hard—and let the top plate settle under its own weight. The floating hinge adjusts to the bacon’s thickness, applying just enough contact for even browning without squashing the meat flat.
Timing and Temperature Control
Bacon on a George Foreman grill typically takes five to eight minutes total, depending on strip thickness and your preferred crispness. For standard-cut bacon, check the strips at the four-minute mark by lifting the lid briefly; they should be starting to brown at the edges and release easily from the plates.
Thick-cut varieties need closer to seven or eight minutes, and you may want to flip them once halfway through for more uniform texture—though the dual-sided heating usually makes flipping optional. Our cooking-times reference covers bacon alongside other common proteins, so you can batch-cook breakfast items back-to-back.
If strips are browning too quickly at the edges but remain pale in the center, crack the lid open slightly for the last two minutes to let steam escape and prevent over-softening. Conversely, if they’re taking longer than expected, check that the grill was fully preheated—starting with a cold surface extends cook time and increases sticking risk.

Removing and Draining Finished Bacon
When the bacon reaches your target doneness—lightly browned and just beginning to firm up for chewy texture, or deep golden with crisp edges for maximum crunch—open the lid and use tongs or a silicone spatula to lift each strip straight up. Avoid dragging strips across the grill plates, which can tear the meat or dislodge stuck-on bits.
Transfer the cooked bacon to a paper-towel-lined plate and blot the top surface gently to absorb any remaining grease. The strips will continue to firm up for about thirty seconds after leaving the grill, so pull them a touch earlier than you think if you prefer a softer bite.
Empty the drip tray immediately—hot bacon fat solidifies quickly and is much easier to dispose of while still liquid. Pour the drippings into a heat-safe container rather than down the sink; once cooled, you can save the fat for seasoning cast iron or discard it with your regular trash.

Cleaning the Grill Plates After Cooking
Unplug the grill and let it cool for five minutes—just long enough that you can touch the plates without burning your fingers, but still warm enough that residue hasn’t hardened. Wipe the plates with a damp sponge or paper towel to lift away grease and any browned-on bits.
For models with removable plates, pop them out and wash in warm soapy water or place them in the dishwasher if the manual allows. Fixed-plate grills require a bit more care: use a plastic scraper or the edge of a silicone spatula to gently coax stuck bits toward the drip tray, then wipe again with a clean damp cloth.
Never submerge the entire grill unit in water or spray it directly with a hose—moisture can damage the heating element. George Foreman grills use embedded coils that sit behind a non-stick coating, and keeping that coating intact depends on gentle cleaning with non-abrasive tools.
Perfecting Your Bacon Technique
Cooking bacon on a George Foreman grill streamlines breakfast prep by draining excess grease automatically and delivering consistent results with minimal hands-on effort. The key steps—preheating thoroughly, spacing strips evenly, and checking progress at the four- or five-minute mark—become second nature after just a few batches.
Once you’re comfortable with basic bacon, the same principles apply to grilling sausage patties, ham slices, and even breakfast vegetables like tomato halves or mushroom caps. Our general usage guide covers setup and safety tips that carry across every recipe, so you can branch out confidently.
Whether you’re cooking for one or feeding a crowd, mastering bacon on the grill gives you a repeatable, low-mess method that frees up stovetop burners for eggs, pancakes, or whatever else rounds out your morning menu.
Notes
No—bacon releases enough of its own fat within the first minute of cooking that additional oil or spray is unnecessary. In fact, extra grease can pool in the drip channels and cause smoking or splattering.
If you’re concerned about sticking, preheat the grill thoroughly and make sure the bacon strips are dry before placing them on the plates. Moisture is the main culprit behind sticking, not a lack of oil.
Yes, but expect the cook time to nearly double—frozen bacon takes ten to twelve minutes rather than five to eight. Lay the frozen strips on the preheated grill just as you would thawed bacon, close the lid, and check progress at the six-minute mark.
Frozen strips may release more water as they thaw on the grill, so keep an eye on the drip tray and empty it partway through if it starts to fill. For best results and more predictable timing, thaw bacon in the refrigerator overnight before grilling.
Bacon grease itself won’t harm the non-stick surface, but letting it sit and harden can make cleanup harder and leave a sticky residue that degrades the coating over time. Empty the drip tray while the fat is still liquid, and wipe the plates clean before they cool completely.
Avoid using metal utensils or abrasive scouring pads, which can scratch the coating and create rough spots where future batches are more likely to stick.
A typical four- to five-serving grill accommodates five to seven standard-cut strips laid side by side with narrow gaps between them. Compact two-serving models hold three to four strips, while larger family-size units can handle eight to ten.
Overcrowding the grill prevents fat from draining properly and causes uneven cooking, so if you need more bacon than your grill can fit in one batch, cook in rounds rather than stacking strips.
The top plate does cook both sides simultaneously, so flipping is optional for most standard-cut bacon. Thick-cut strips benefit from a single flip at the halfway point to ensure the center cooks through without over-crisping the edges.
If you prefer deeply caramelized bacon with extra-crispy texture, flipping once can help achieve more uniform browning across the entire strip.
Yes—turkey bacon and Canadian bacon both work well on the grill, though timing differs slightly. Turkey bacon is leaner and cooks faster, usually in three to five minutes, while Canadian bacon is pre-cooked and only needs two to three minutes to warm through and develop grill marks.
Watch both varieties closely to avoid over-drying, and transfer them to the plate as soon as they reach your preferred color and texture.